
Birch trees are among the most versatile trees of the North Woods. Besides being extremely resilient (they are the last hardwoods standing before the Arctic tundra), their wood is valuable for handcraft, their leaves make a wonderful yellow dye for textiles (See Brendan Gaffney’s article in Issue Thirteen), and they can be tapped in the spring to produce birch syrup (cooked down, it tastes like molasses). One of the most useful parts of the tree is the bark – it has been utilized for everything from canoes to shelter to watertight containers to clothing (yes, birchbark clothes were all the rage back in the day). But most importantly, it is highly flammable. A piece of birchbark that has been floating in a pond for a few days will ignite immediately with a match. This material has saved countless lives over the millennia, as it provides a sure source of fire when there are no other options.
The oils in the bark that make it so flammable can be extracted through dry distillation over a campfire. This process (or similar) has been utilized for a very long time to create birch tar, valuable as an adhesive, bug repellent, medicine, and other uses. Pretty powerful stuff. I’ve wanted to try making birch tar for some time, so when I recently had to cut down a few unhealthy white birch trees next to our driveway, I rounded up some assistance and gave it a try.
 First thing – you need a couple cans, one larger to pack bark into, and one smaller to catch the tar as it drips out. I didn’t have lids for either, but that’s not a big deal. I punched a ½” hole in the center of the bottom of the bigger can and pounded the bottom down, bending it into a dish to allow for tar to drain to the hole as it is distilled. Bury the smaller can in your fire ring so just the top edge sticks out. You will want the big can of bark to sit firmly on top of this can.
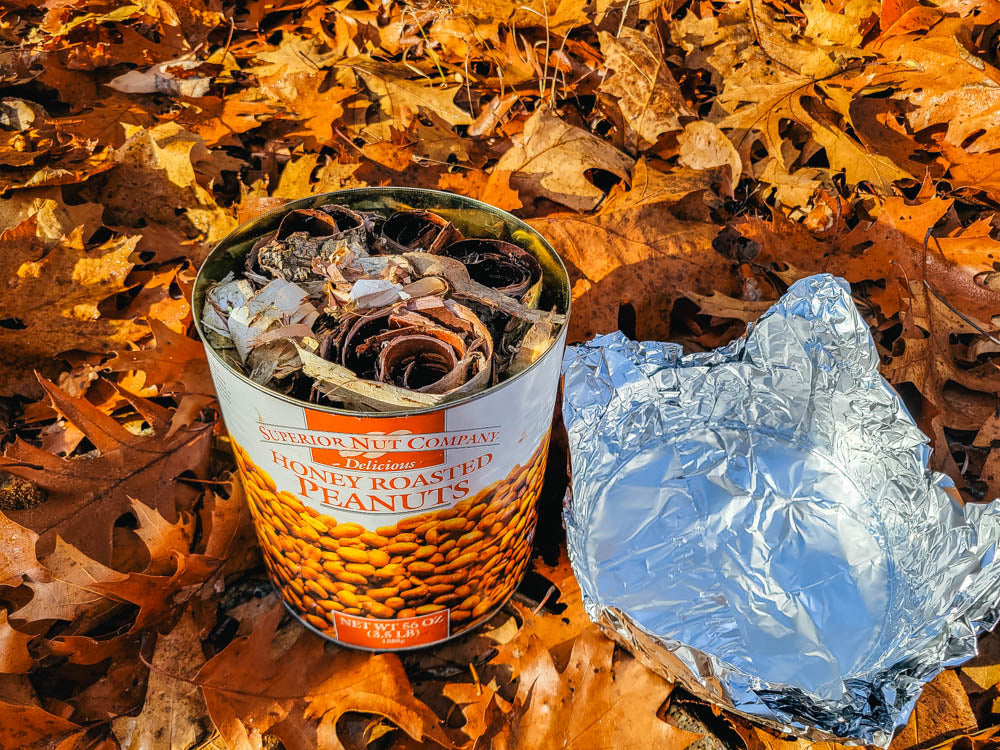 Next, pack the big can full of bark. We stuffed it in rolls, which seemed to work well. The more you fit in (or the bigger your can is), the more tar you get.

I sealed this can with aluminum foil and baling wire. You want to try to exclude oxygen from the inside – the bark will burst into flame if there is a draft.
 Place the big can on the smaller one. The boys grabbed some clay from the stream (10 feet away) and packed it around the base to keep the two together. This also helped with the seal.

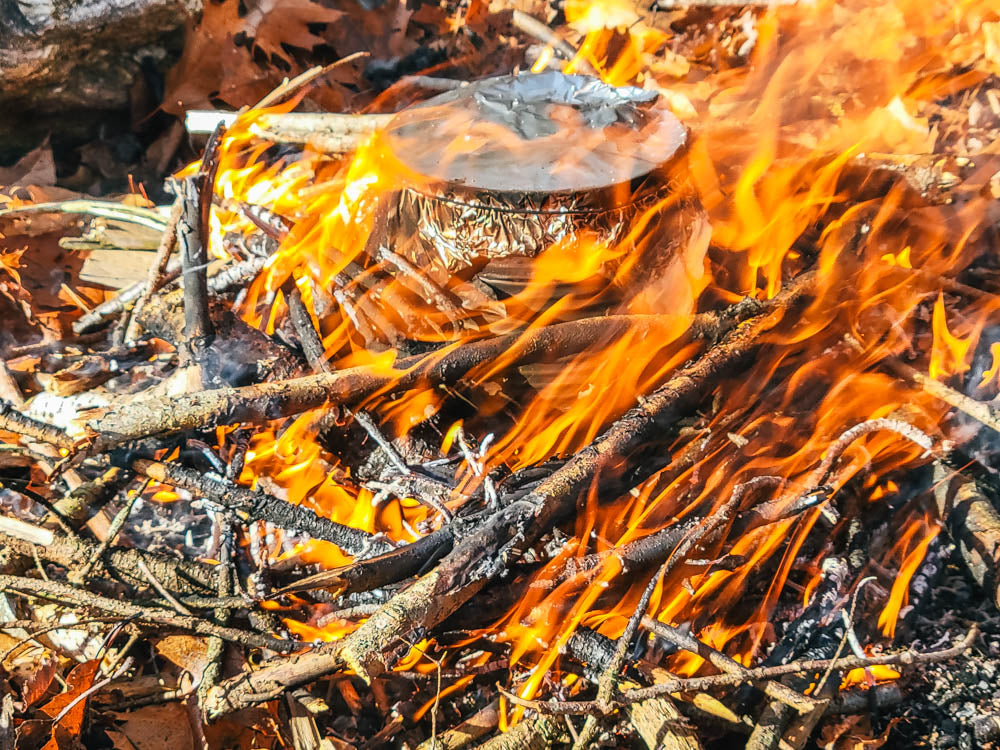 Surround the can with kindling, birch bark (good stuff, that), and light it. You’ll want to keep a steady blaze going for at least half an hour, longer if you have an especially large can of bark. There’s some trial-by-error here to determine burn time. If the burn is too short, you won’t extract all the oil available.
 Once the fire has burned down, carefully scrape the coals and ashes away and remove the top can. There is tar in the bottom – success! Be careful to not contaminate the tar with dirt or ashes.
If there is some water in the tar (the two do not mix and form separate layers), this can be simmered off by setting the can on some hot coals.
And there you have it – birch tar for all your canoe-building, cut-healing, bug-repelling, arrow-making needs! I’ll be ready for the next Maine blackfly season, that’s for sure.
-Mike