
One of the tasks that a hand-tool woodworker will be sure to tackle sooner or later is re-handling a chisel. If you’ve caught the antique tool bug – and it is a sickness – then you’re going to get more than enough opportunities to practice this skill.

The handle of my 2" firmer chisel has suffered a few splits over the years through all of this hard construction work we’ve got going on over here. I’ve glued it a few times, which works just fine for a while, but I decided to squirrel away a few minutes to get a better handle on this thing. I invested less than 15 minutes in the afternoon, and I’ve done everything except final fitting, final chamfering, and finishing. I’ll tackle those things after the holiday.
Here’s the process thus far:

The chisel to be re-handled. I decided to copy the proportions of the existing handle because I liked it so much. The handle was 5-1/4" long. This is not a standardized length. The chisels in my shop have varied handle lengths. I simply try to make it balanced visually with the length of the blade on that given chisel.

I started with a scrap of maple I had kicking around. I hewed the blank closer to size (and approximately square) and then planed it into a taper on all four sides. I referenced the bolster on the chisel to make sure I don’t plane too far (we’ll look at the bolster below).

This is all fore plane work. I don’t sweat the presence of tear out yet. This is still oversized.

The butt of the chisel is 1-1/4" thick.

I sawed a shallow kerf around the chisel at the butt so that as I plane and refine the facets, I won’t lose a pencil line measurement. I want to know at all times where I will be cutting it off.

I planed chamfers on the four edges to make a rough octagon that is still slightly larger than the bolster. The V-block depicted here is sometimes called a “joiner’s saddle.” It enables you to hold stock on edge for planing without the piece rolling around the bench. An essential shop appliance.

Rough chamfers compared to the old handle.

I then removed the defunct handle by placing the chisel securely in a front vise and splitting it off with a mallet and chisel.

The handle fragments in this photo show the tapered tang hole that needs to be made.

Now I can bore the holes for fitting the tang into the new blank. I started with a bit that matches the diameter of the tip of the tang and went a hair deeper than the length of the tang, being very careful to bore a hole straight in line (not crooked) with the handle.

I then used two larger bits to widen the hole somewhat, boring only to the depth I need to match the taper of the tang. The old blue-tape depth stop works a treat for this.
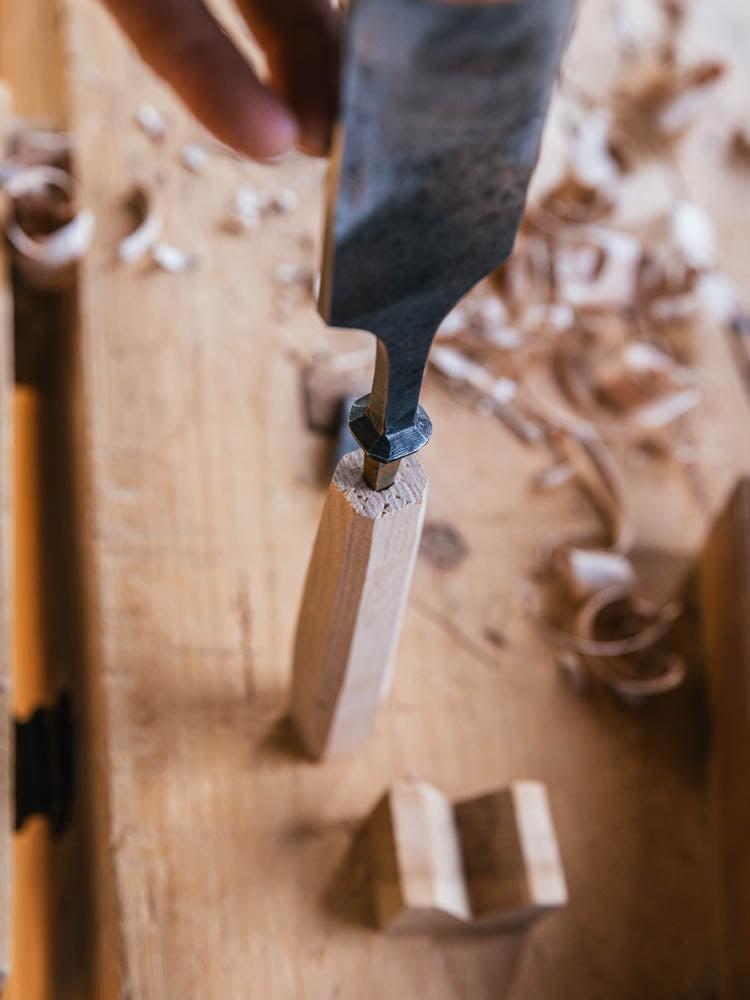
I hold the chisel and tap the handle onto the tang, shy of splitting it. Because the hole is round at this point, it doesn’t go in vary far, but it is enough to get a good visual check.


I check the alignment to make sure it’s straight in both top and side views.

Once I decide the orientation, I label the top so that the tang is always inserted the same way during the final fitting process.

I then square the hole with a small chisel (1/4", 1/8"). This is awkward because the nature of the tapered hole means you will be always working against the grain. But it doesn’t have to look pretty in there. I just take little bits at a time and use the drill bit to clean out the waste as needed.

When the handle is able to be tapped on about 3/4" away from the bolster, it is time to switch gears in the fitting process. My 15 minutes were up at this point, so next time I’ll how you how I final fit the tang with a torch.
-Joshua