
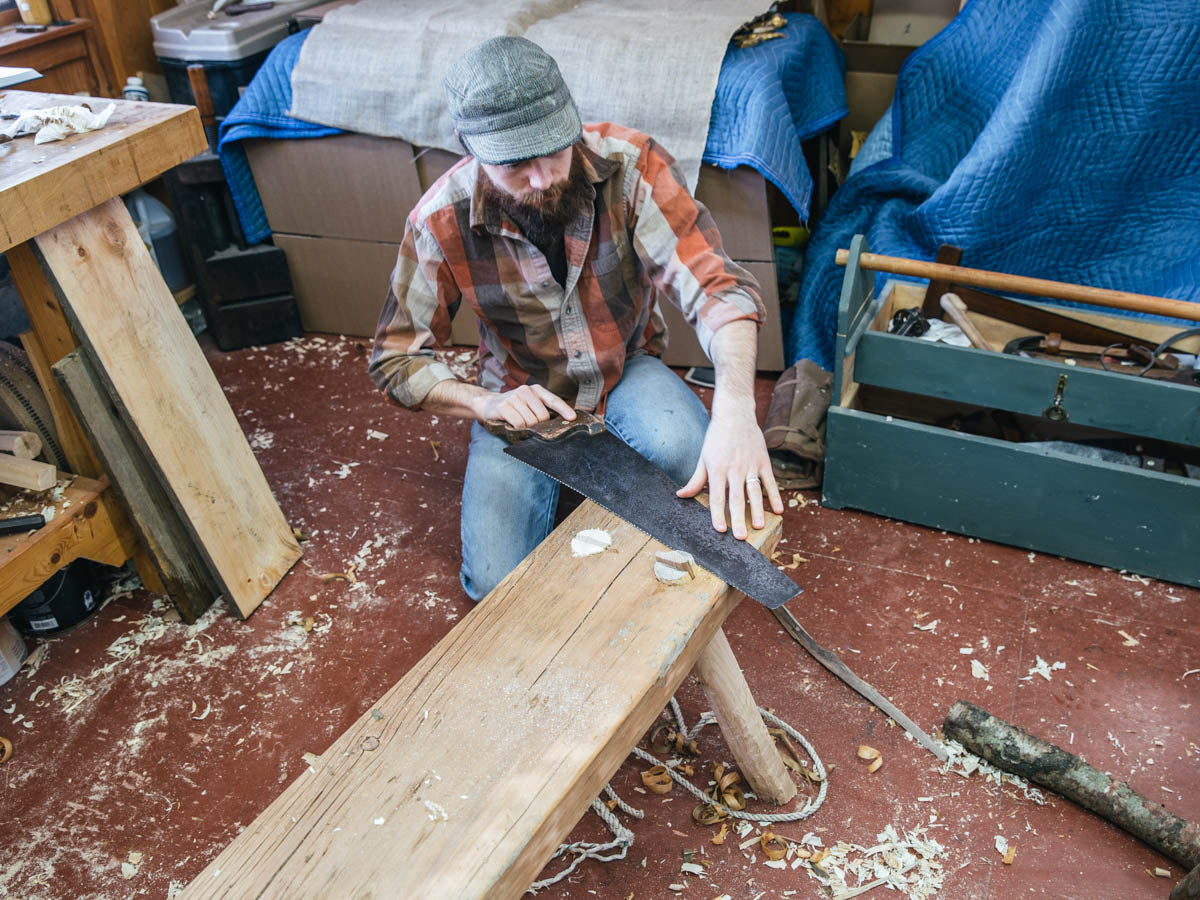
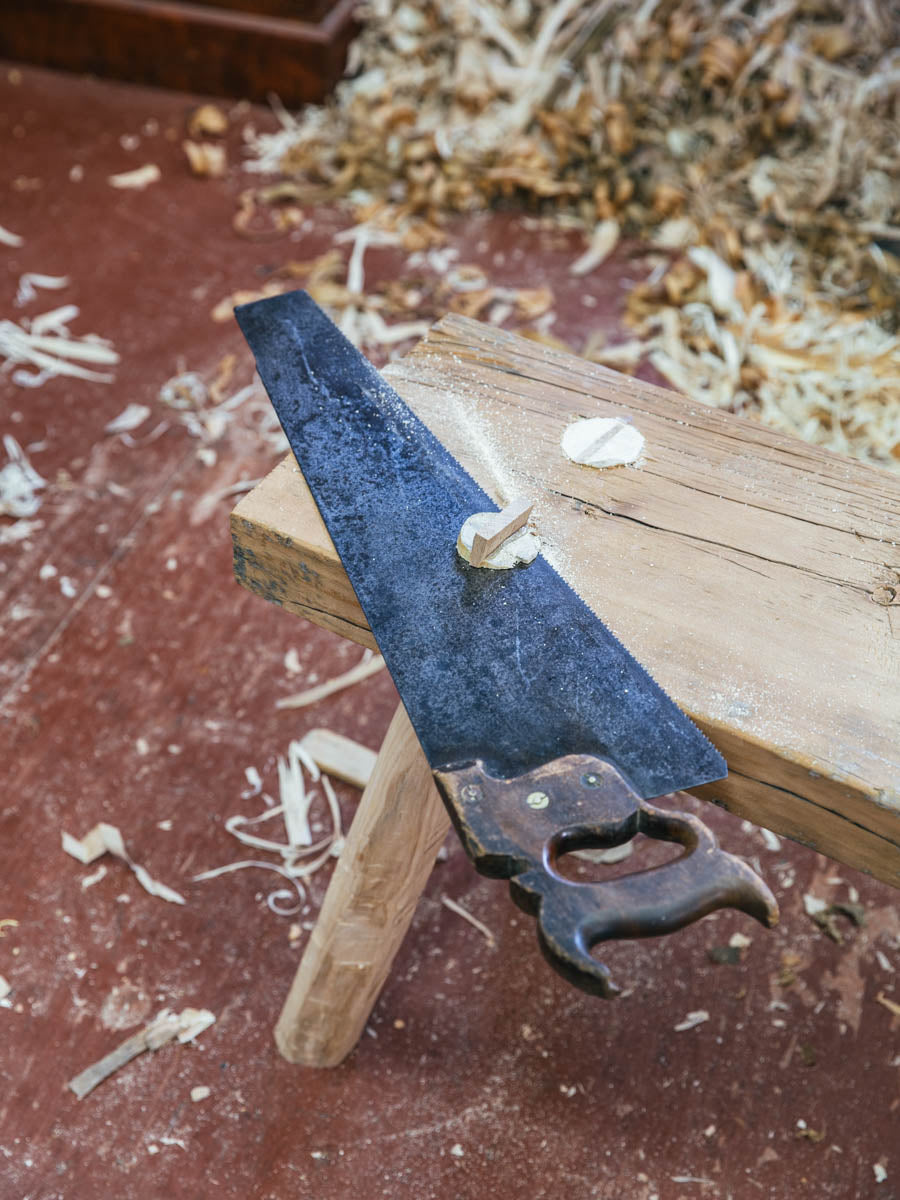
Today, Mike and I got the benches done and spent a good amount of time exploring their use. First, we had to cut those protruding tenons flush. Since I broke my flush cut saw a while back, I opted to use my crosscut saw for the task. I considered getting fancy and shimming up off the benchtop top to prevent the saw’s set from marring the top but decided against it. I’ve always trimmed bigger tenons like these with a regular crosscut and rarely nick the wood in any considerable way. The way I do this is by placing pressure on the back of the saw while carefully starting a kerf. I work around from all sides until the kerf meets the whole way around. As tricky as it sounds, it’s not. The kerf of my saw didn’t nick the top once and the cuts were darn near flush. Actually, one was perfectly flush which ironically made it harder to plane nicely without digging into the top. The other three had a hairline of thickness to plane and went down flush with less fuss.

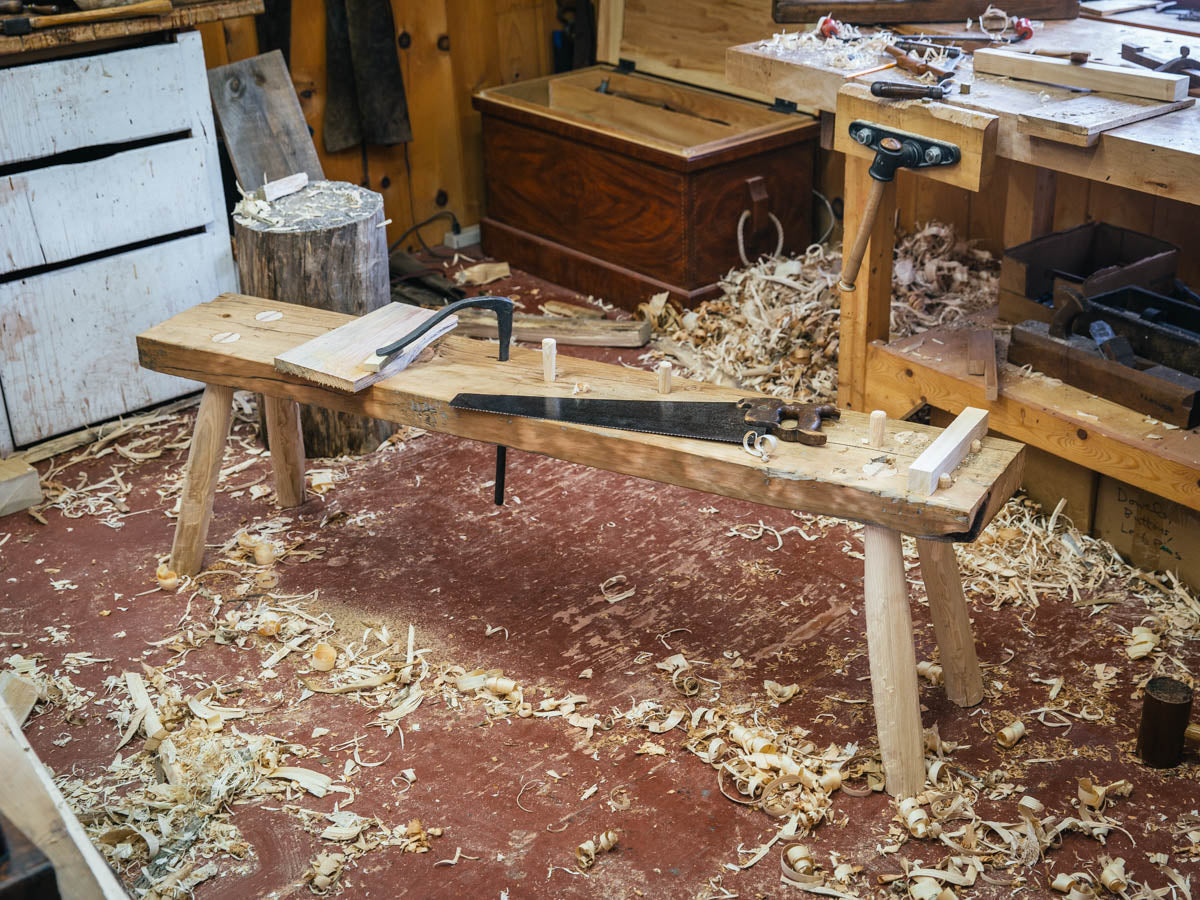
After the tenons were cut free, we bored the holes for the ¾” holes for planing stops. The stops were shaved from ash leftover from my leg stock. I made sure mine were as consistent as I could (so that they would be tight at all height adjustments) but Mike discovered some interesting benefits to pegs that were less than straight. Very interesting discussion ensued about better designs for pegs. I’ll leave that for Mike to blog about but I think he’s onto something really good here. He also discovered that if he was planing a board that was a couple inches longer than necessary, he could drill a hole on it’s end and place it over the peg, pinning it in place. This freed him to plane without any bouncing around. He could even turn around and plane the other direction without moving the board. Genius!


As soon as I had my stops in, I had to take it for a test run. The first few minutes of planing were surprisingly tiring because I was relying primarily on bicep power and had almost no body momentum behind the plane. We experimented with ways to overcome this and found some interesting postures that made the operation quite effective. The most powerful planing was when we stood up and put a knee on the board. It actually was the easiest planing I think I’ve ever done because my whole body was over the work. I haven’t tried it for extended periods of time, mind you, but I think it has real promise. This was vindication after my first few moments of laboring hard using only my arm strength.

We spent a good amount of time discussing hole spacing for edge planing. We ended up figuring out a pattern based on a few different sources: the Woodworking in Estonia benches, the aprons of Nicholson’s bench, and one of Jonathan Fisher’s benches. I can expound on the logic behind our pattern at another time but I will say that we tried to figure out the way to have the least holes and most flexibility with the stock we envisioned working with. After using it a bit, I think we nailed it.


Then we got out the rope. This was something we had wanted to try ever since we saw it in Woodworking in Estonia. A surprising number of the benches showed a loop of rope wrapped over the work piece and the craftsman holding it down with his foot. It’s almost like a poor man’s shaving horse. When we first tried it, I had the loop around the whole width of the bench and it didn’t hold very well. Then we wrapped a piece of leather around the rope. Still didn’t hold well. It seemed the downward force was spread to far side to side. Feeling defeated, we looked closer at the images in the book and realized that the rope was always fed through holes in the top, enabling the rope to be pulled down close to the work piece. This was the charm. It held great for chopping mortises. We were really impressed. Super easy to adjust and rugged holding power.


So my bench is complete. Mike still has some complex features to add… as soon as he finds the perfect crooked branch for the task. He’s also planning on working out a quick-to-install shaving horse apparatus. It should be very handy.

We really had no idea of what to expect with this bench form. Although it’s not better than a tall bench for some operations, I think it just might be better for others. We will continue to explore workholding on these benches and report it all here. This form has serious promise. We really think you should build one, no matter what kind of woodwork you do. Woodworking in Estonia has proven that there are no limits to the creativity of a craftsman when it comes to workholding solutions. When we set out on this bench build we vowed to explore unfettered by any convention (modern or otherwise). This exploration has expanded our thinking about the craft as well as our respect for the craftsmen that have come before us.
For the other posts about this build, click here.
If you’re looking to see more of this bench in action and read about the research behind it, you can read Chris Schwarz’s article in Issue Two.